My First Water Cooling Build
I should point out that although the Mountain Mods UFO cases are perhaps perfect for water cooling projects given their prodigious space...

such a case is simply too large for my office. My current furniture arrangement dictates a fairly conventional case design.
Here are my thoughts regarding each of the common internal rad mounting configurations...
Top-mounted Rad: In this configuration fans draw air down through the top of the case. While this is a very common practise, likely due to the ease of modding the top of the case, I don't think its ideal from an airflow perspective. In effect, the fresh air being blown into the case is "fighting" the natural tendancy for hot air already inside the case to rise and be exhausted out the top. I'm sure that whether this is a significant problem or not depends largely on the ventilation design of the case and the exhaust strategy.
Bottom-mounted Rad: This configuration is obviously the opposite of the top mounted configuration but has the advantage of better airflow characteristics as it draws cool air upwards into the case while hot air is presumably being exhausted out the top/rear. The only potential issue with this configuration is the clearance under the case to allow for sufficient airflow as well as the space between any expansion cards on the motherboard and the bottom of the case for the rad/fans. In the end I didn't really consider this configuration seriously.
Side-mounted Rad: This configuration is not very popular likely because it would require heavy case modifications... IF the case can even support such a configuration. The Lian Li V2000 is an obvious choice for a case and Voyeurmods.com previously sold a custom water cooled model with a quad heater core (pictured below) that initially caught my attention...

Another case design that calls out for side mounted rads is the Coolermaster Stacker 830 with it's quad fan side panel. My concern was whether there was enough clearance between the fans and the PCI cards to mount radiators in between...

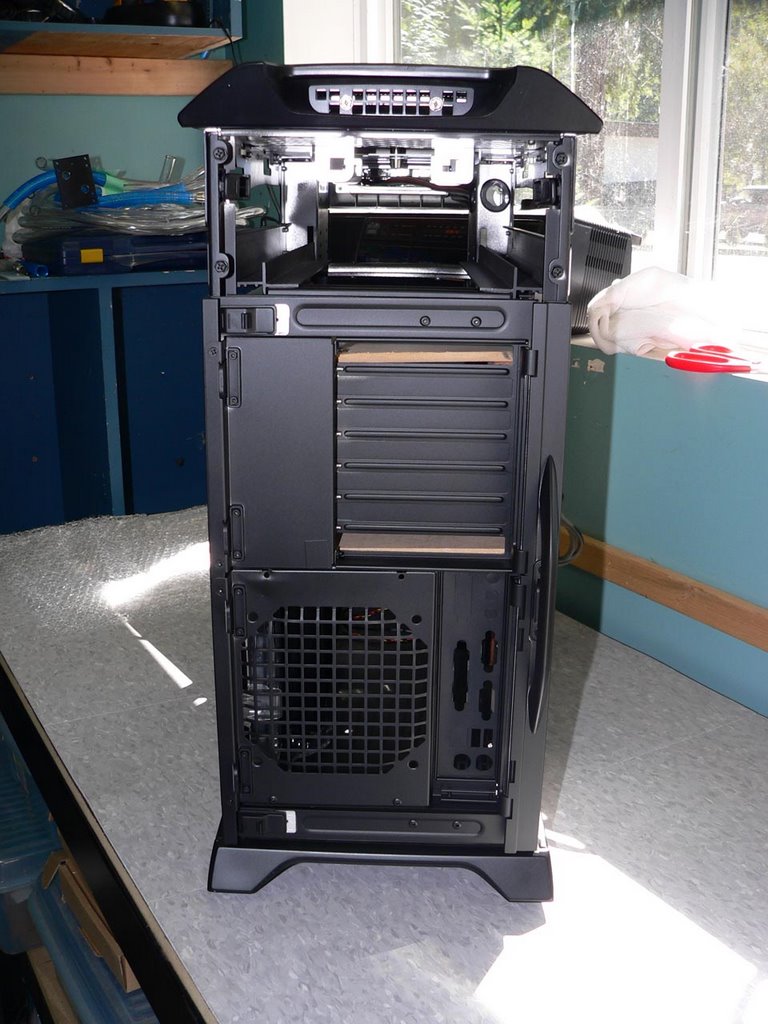
My Case Choice: Coolermaster Stacker 830 (Black)

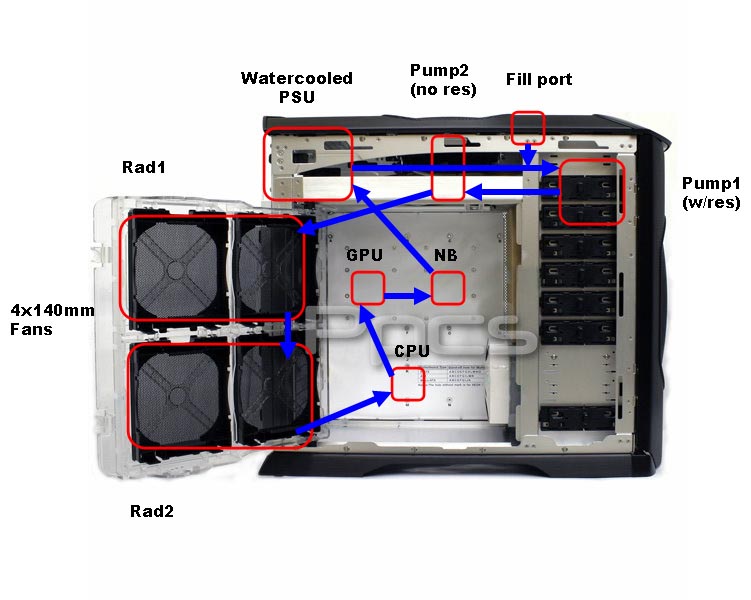
Ultimately, when the Coolermaster Stacker 830 became available in black, I was really drawn to the challenge of utilizing that quad fan side panel to mount a pair of dual rads. This was appealing to me for a few reasons (1) it was a very unique approach (2) mods would probably be minimal (3) the fresh air drawn into the case interior through the side panel would also ensure the entire system remained very close to ambiant temperature - particularly given the 830's outstanding ventilation all around.
As I mentioned above, one of my chief concerns was whether there was enough space between the fans and the PCI cards to mount rads... I took a risk and ordered the case as no one online would provide a measurement. It turns out there is just over 30mm of space to work with... just enough for some low profile rads! :)
 The Coolermaster Stacker 830 also has a number of other features which I found advantageous...
- Removable motherboard tray that can be reconfigured for normal or inverted mounting or for BTX applications. This is important to me because my computer sits on the right side of my desk and I would prefer to access it via the right side panel and not the left.
- Extremely open design with excellent ventilation and large top blow-hole vent will allow for adequate heat exhaustion without fans with major components being water cooled and the quad fan side panel blowing cool air onto the motherboard.
- Front door that is highly ventilated that can be taken off and/or swapped from one side to the other.
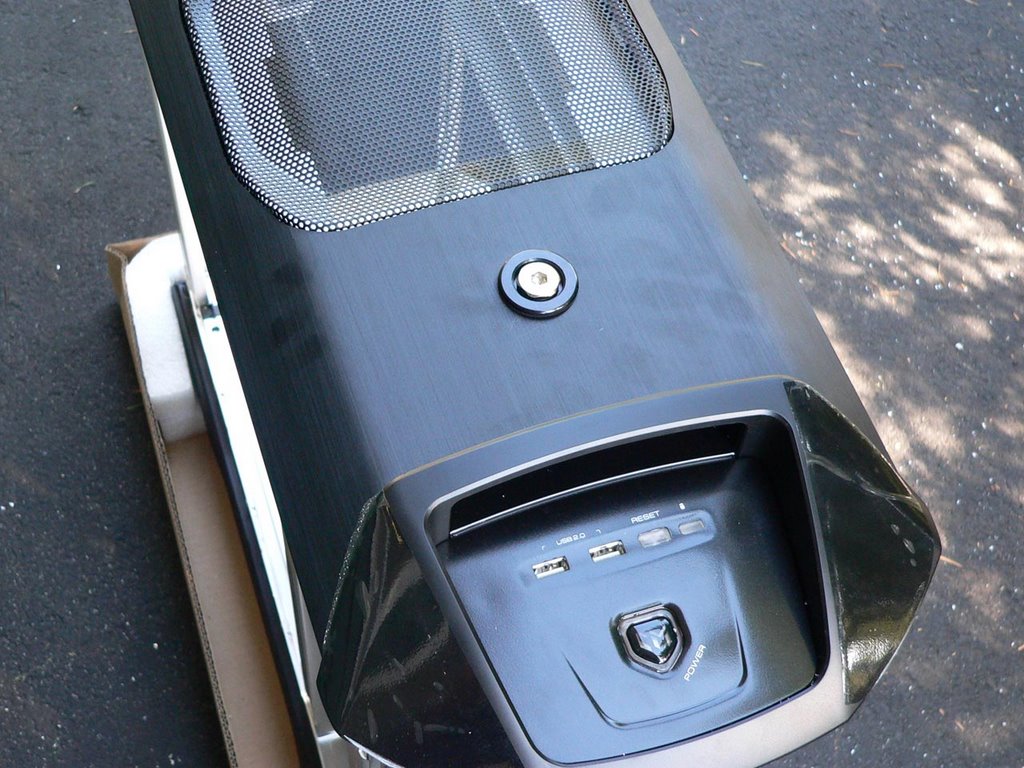
- Top-front mounted power/reset button and front panel controls for easy access without opening the door.
- Included a 4-in-3 drive bay device for mounting multiple hard drives in an isolated drive cage that could then be loaded in any 3 of the 9 drive bays giving me maximum flexibility in how I utilize my drive bays and where the hard drives could be placed.
- Large vertical space on either side of the drive bay stack for running cables up and down the chassis - keeping them out of the main compartment.
- Sufficient space behind the motherboard tray for running cables to keep them out of sight and improve the aesthetics of the main compartment.
- Sufficient space for any size of power supply (there is enough room to mount dual ATX power supplies in the space provided).
Case Mods
Even with all the great assets of the 830, it still needed some major/minor modding to get it primed for Project Waku...
- Added Lian Li casters (black) to the bottom of the case. They are countersunk to the actual bottom so that the skirts cover the wheels nicely but still give it about 1/2" of clearance to roll.
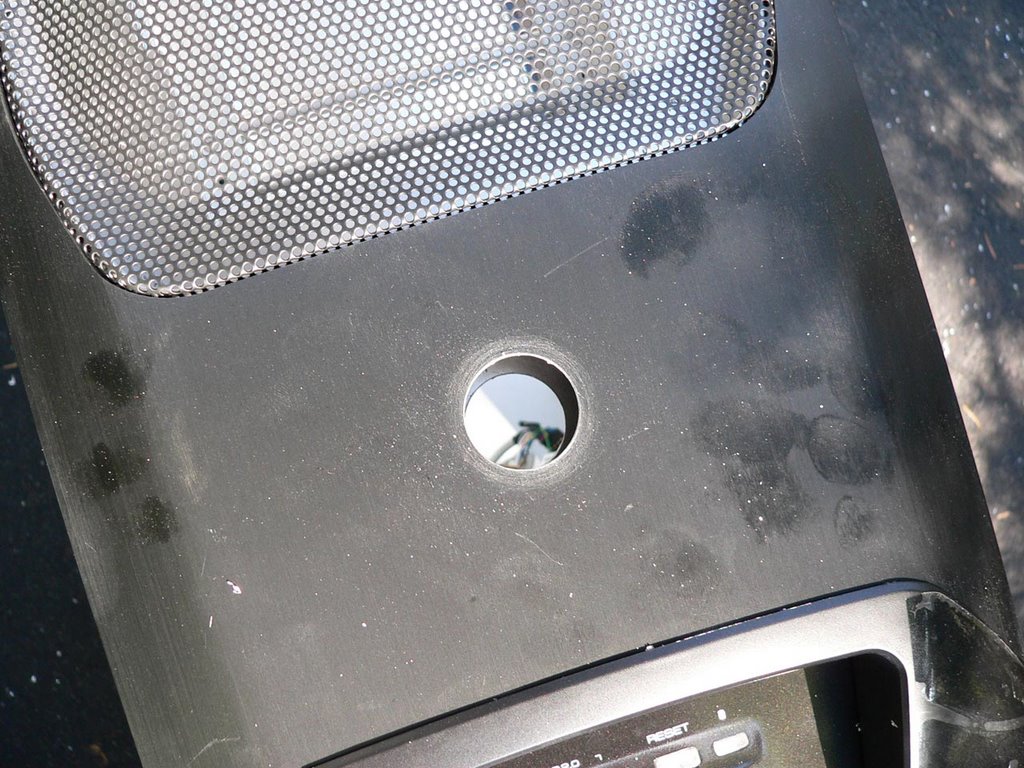
- Drilled out a 1" hole using a metal hole-saw on the top for the fill port. The 830 actually has the black top and then another aluminum top underneath that both had to be drilled out for the fill-port.
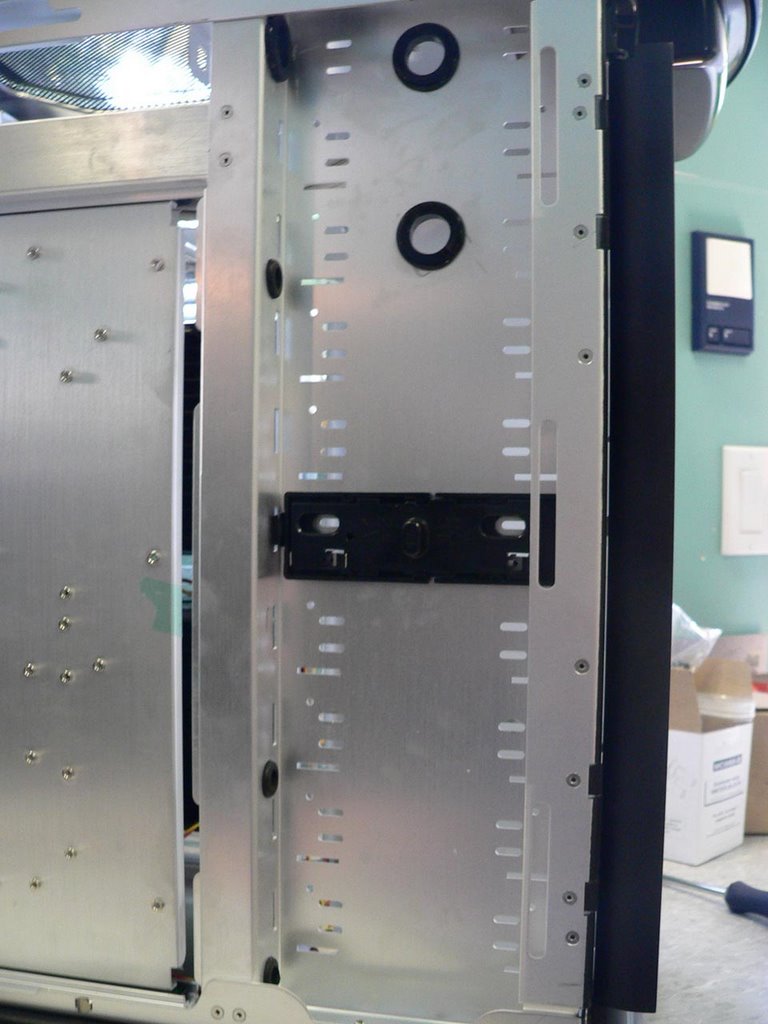
- Since I plan to use the column of space along the left side of the drive bays for cable management, I drilled out a number of 1" and 1/2" holes along the left drive bay areas for cables to enter in/out of that area from the motherboard compartment and various drive bays.
- I also drilled out a 1" hole with grommet for the P4 power cable which can be routed behind the motherboard tray and now come through this hole and be attached to the motherboard with a minimum of cable clutter.
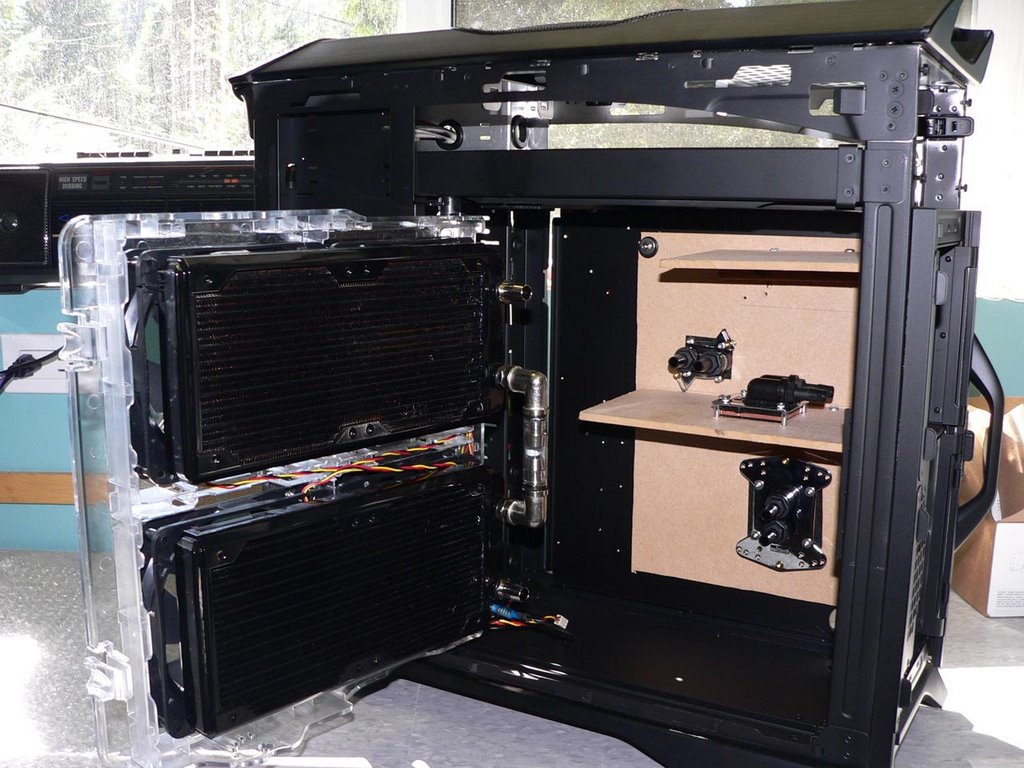
- Painted the rest of the chassis black. (Coolermaster was clearly too cheap when it came to anodizing the black chassis components). In the pics you can see my wooden computer used to do proof-of-concept assembly, testing, and tube routing, length determinations.
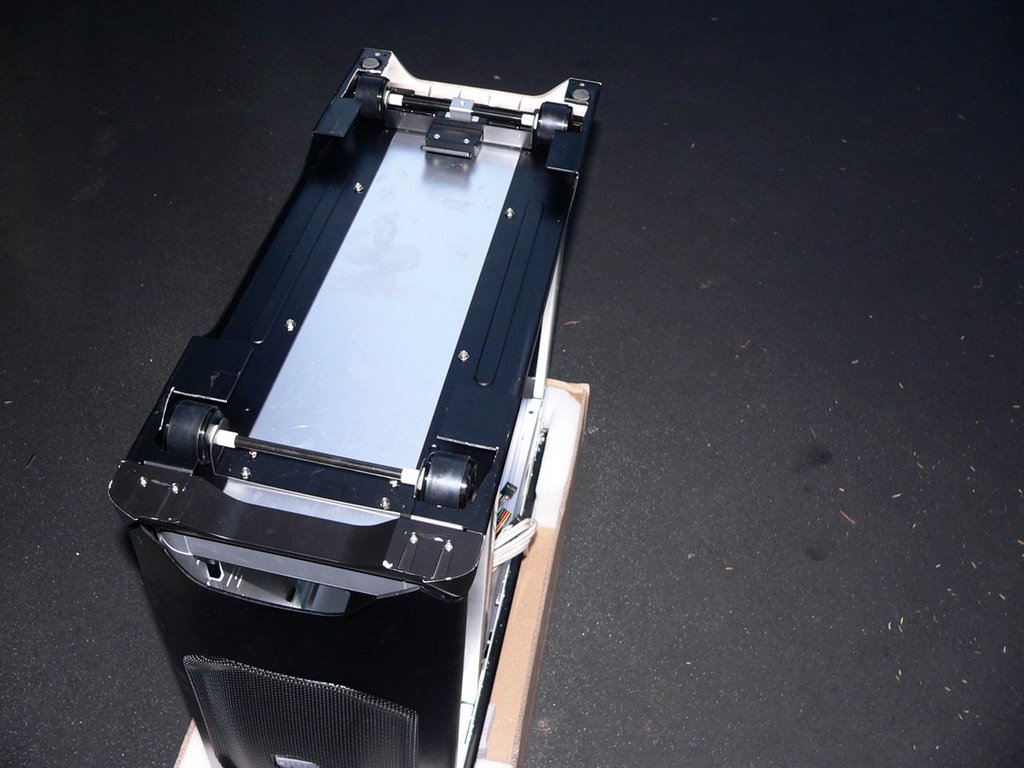
- Reversed the side fan tray door so instead of being hinged towards the rear of the case, it is now hinged at the front. This was a critical mod for my rad mounting as it allows the rad inlets and outlets to be out of the motherboard area and closer to the front of the case which will still allow the door to be opened even while the system is running without excessive lengths of tubing.


Great ideas!
Checking things out as I have a Stacker 830 and I'm trying to figure out how to best WC it also.
I'd love to put a PA120.3 in the bottom, but I think that might be too much work.
So far I'm going to put a PA120.2 in the front & just one DCC-2 w PetraTop. My only concern is I'm running a crossfire setup and would really like the headroom of a PA120.3 :)
Cheers!
Posted by Anonymous |
12:32 PM
Anonymous |
12:32 PM
A PA120.3 would definitely fit on the bottom but you would need to cut some holes obviously. Another thing to watch out for, of course, is that if you use the normal mobo orientation, you could loose several PCI slots at the bottom of your Mobo due to the height of the rad with fans that would not allow any expansion cards to fit into those slots. If you went with an inverted orientation, this wouldn't be a problem as long as your CPU Block barbs were not blocked in the same way.
Posted by VirtualRain |
11:54 PM
VirtualRain |
11:54 PM
After getting more than 10000 visitors/day to my website I thought your virtualrain.blogspot.com website also need unstoppable flow of traffic...
Use this BRAND NEW software and get all the traffic for your website you will ever need ...
= = > > http://get-massive-autopilot-traffic.com
In testing phase it generated 867,981 visitors and $540,340.
Then another $86,299.13 in 90 days to be exact. That's $958.88 a
day!!
And all it took was 10 minutes to set up and run.
But how does it work??
You just configure the system, click the mouse button a few
times, activate the software, copy and paste a few links and
you're done!!
Click the link BELOW as you're about to witness a software that
could be a MAJOR turning point to your success.
= = > > http://get-massive-autopilot-traffic.com
Posted by Anonymous |
12:20 AM
Anonymous |
12:20 AM